Introduction to Simply Sandwich Bread
The joy of homemade bread: Why should you make your own?
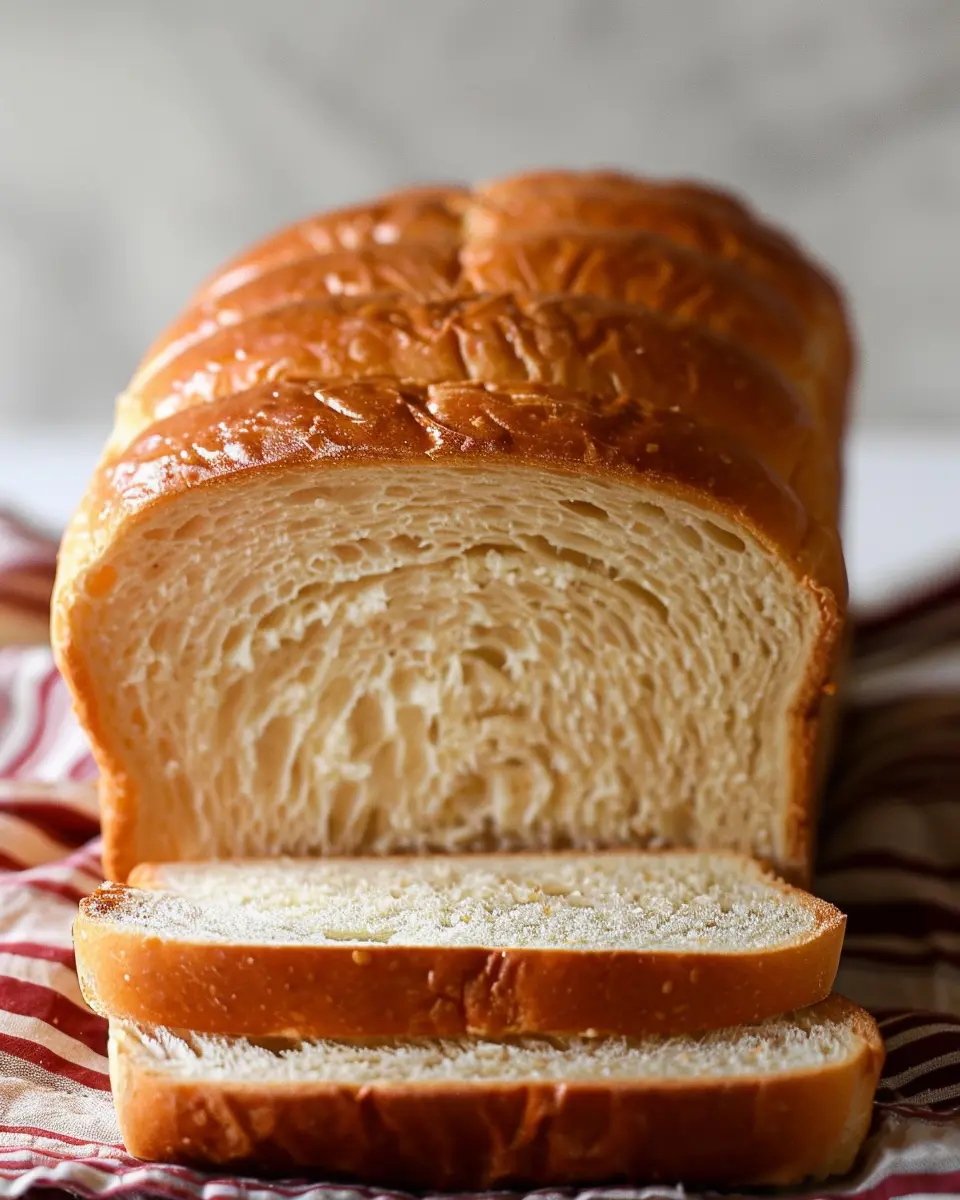
There’s something truly special about the smell of homemade bread wafting through your kitchen. In today’s fast-paced world, taking a moment to slow down and bake a loaf of simply sandwich bread can be a delightful escape.
Making your own bread might seem a daunting task, but it’s easier than you imagine—and the rewards are plentiful. For starters, homemade bread is made with wholesome ingredients, allowing you to skip preservatives and additives often found in store-bought varieties. According to a Harvard Health Blog, consuming less processed food can lead to better overall health outcomes. Imagine biting into a warm, soft slice of simply sandwich bread made just the way you like it. The satisfaction derived from your creation alone can elevate any sandwich from ordinary to extraordinary.
Your kitchen becomes a hub of creativity! Think about all the flavors you can experiment with, from using different types of flour, such as whole wheat or gluten-free alternatives, to adding seeds or herbs for an extra kick. Plus, the customization doesn’t end there. You can enjoy your simply sandwich bread with a range of fillings, whether you’re in the mood for turkey bacon, chicken ham, or even a plant-based option!
Additionally, baking bread at home can be a fantastic way to unwind after a busy workday. It encourages mindfulness—focusing on the process of kneading and shaping the dough can be a form of meditation. So, why not gather some friends or family? The experience can turn into a fun social gathering, where teammates or loved ones bond over the shared task of loaf-making.
If you’re interested in the science of baking, you’ll find it both fascinating and rewarding. Understanding how ingredients interact can lead to countless successes in your culinary endeavors. And did we mention that homemade bread can also be a fabulous gift? Sharing a loaf with friends or neighbors isn’t just a kind gesture; it’s an invitation to share in something special.
In summary, making your own simply sandwich bread is not only about the end result; it’s also about the joy, creativity, and community you cultivate along the way. Ready to get started? Let’s roll up our sleeves and dive into this delightful recipe!
Ingredients for Simply Sandwich Bread
Essential ingredients for a basic loaf
Creating the perfect simply sandwich bread starts with just a few essential ingredients. Here’s what you need for a delightful and fluffy loaf:
- All-purpose flour: This is the backbone of your bread, providing structure and balance.
- Active dry yeast: It’s what makes your bread rise! Fresh yeast can really elevate the texture.
- Warm water: Use water between 100°F and 110°F to activate the yeast effectively.
- Sugar: A touch of sugar helps to nourish the yeast and adds a hint of sweetness.
- Salt: This enhances flavor and strengthens the dough.
- Butter or oil: For richness and tenderness, make sure to melt it beforehand.
These ingredients come together seamlessly, and you’ll find that the process is both enjoyable and rewarding.
Optional add-ins for extra flavor
Once you master the basic loaf, you might want to experiment with some optional add-ins to elevate your simply sandwich bread. Consider these options:
- Herbs: Fresh or dried herbs like rosemary or thyme can infuse the bread with lovely aromas.
- Seeds: Adding sunflower seeds or flaxseeds not only enhances nutrition but also adds a delightful crunch.
- Cheese: Shredded cheese can create a savory twist, perfect for grilled cheese sandwiches.
With these creative ideas, your sandwich bread will be anything but ordinary! For inspiration on flavor combinations, check out this guide on bread-making by experienced bakers. Embrace your culinary journey and enjoy the delicious rewards you create in your kitchen!
Step-by-step Preparation of Simply Sandwich Bread
Making simply sandwich bread at home is a satisfying process that fills your kitchen with delightful aromas. The beauty of homemade bread goes beyond its flavor; it’s about the love and care you put into every step. So, let’s embark on this baking journey together!
Prepare the dough
To start, let’s gather our ingredients. You’ll need:
- 4 cups of all-purpose flour
- 2 tablespoons sugar
- 2 teaspoons salt
- 1 packet (2 1/4 teaspoons) active dry yeast
- 1 ½ cups warm water (about 110°F)
- 2 tablespoons unsalted butter, softened
In a large mixing bowl, combine the warm water and yeast, letting it sit for about 5 minutes until it becomes frothy. This indicates that your yeast is active and ready to work its magic. Meanwhile, in a separate bowl, mix the flour, sugar, and salt. Once the yeast mixture is bubbly, add it to the dry ingredients, along with the softened butter. Stir until it all comes together into a shaggy dough.
Knead the dough for the perfect texture
Now comes the fun part—kneading! This step helps develop the gluten, which gives the bread its structure. Turn the dough out onto a floured surface and knead it for about 8-10 minutes. You’re looking for a smooth and elastic texture. If you’re unsure, the “windowpane test” is a handy trick: stretch a small piece of dough; if it forms a thin, translucent layer without tearing, you’re good to go!
If you need more help understanding gluten development, you can check resources from the King Arthur Baking Company.
First rise: Patience is a virtue
Place your kneaded dough in a lightly greased bowl, cover it with a damp cloth or plastic wrap, and let it rise in a warm environment for about 1 to 2 hours. This initial rise is crucial as the dough needs time to double in size, allowing the flavors to develop. While you wait, why not prep your favorite sandwich fillings? Consider turkey bacon, chicken ham, or fresh veggies—get creative!
Shape your bread like a pro
Once your dough has risen beautifully, punch it down gently to release the air. Turn it out onto a floured surface again. To shape your simply sandwich bread, flatten the dough into a rectangle and then roll it tightly from one end to the other. Pinch the seams to seal and tuck the ends under for a neat finish.
Place the shaped dough seam-side down in a greased loaf pan. Need a visual guide? You can find tutorials on YouTube for various shaping techniques.
Second rise: Waiting can be delicious
Cover the loaf with a cloth and let it rise for another 30 to 45 minutes or until it has doubled in size. Your kitchen should start smelling amazing by now! This second rise is essential for a fluffy loaf, so resist the urge to skip it.
Bake to golden perfection
Preheat your oven to 350°F (175°C) about 20 minutes before your bread is ready. Bake the loaf for 25-30 minutes, or until it sounds hollow when tapped on the bottom and is a lovely golden brown. If you’d like, brush the top with melted butter as soon as it comes out of the oven for extra flavor.
As the bread cools, resist the temptation to slice it right away; letting it rest for at least 30 minutes enhances the texture. When you finally cut into it, you’ll be rewarded with slices perfect for your favorite simply sandwich bread fillings.
Remember, homemade bread keeps well in an airtight container at room temperature, so enjoy your creation and share it with friends—because nothing beats the joy of homemade goodness!
Variations on Simply Sandwich Bread
When it comes to mastering simply sandwich bread, the possibilities are endless. This delightful staple doesn’t just stop at the classic white loaf; let’s explore some tasty variations that can elevate your sandwiches to new heights.
Whole Wheat Twist for Healthy Options
Transform your simply sandwich bread into a wholesome delight by incorporating whole wheat flour. Whole wheat adds a nutty flavor and a boost of fiber, making your bread not only healthier but heartier.
- Pro Tip: Replace half of the all-purpose flour with whole wheat flour for a lighter texture while still enjoying the benefits.
- Nutritional Boost: Whole grains are linked to lower cholesterol and improved digestion, which is a win-win!
For a perfect blend of taste and nutrition, consider checking out resources from the American Heart Association for more tips on incorporating whole grains into your diet.
Flavored Versions: Garlic, Herbs, and More
Bored with the usual? Then it’s time to play with flavors! Adding garlic or herbs to your simply sandwich bread can really tantalize those taste buds.
- Herb-Infused Bread: Incorporate fresh or dried herbs like rosemary, thyme, or basil right into the dough. This adds a beautiful aroma and depth of flavor that will make your sandwiches unforgettable.
- Garlic Goodness: Mixing in minced garlic or roasted garlic can create a savory loaf that’s perfect for pairing with soups or stews.
Just imagine a warm slice of garlic herb bread with some crunchy turkey bacon and fresh tomatoes. It’s an irresistible combination that might just become your go-to weekday lunch.
Try experimenting with these variations, and don’t hesitate to share your experiences or favorite combinations in the comments! There’s nothing like a personal story to inspire others on their bread-making journey.
Baking Tips and Notes for Simply Sandwich Bread
Common Issues and How to Fix Them
Baking simply sandwich bread can be a delightful experience, but sometimes things don’t go as planned. Here are a few issues you might encounter:
-
Dense Loaf: If your bread comes out too dense, it could be due to insufficient kneading or not enough yeast. Make sure to knead your dough adequately and check the expiration date on your yeast!
-
Flat Bread: A flat loaf often indicates that the dough hasn’t risen enough. Ensure your yeast is active before using and give your dough time to proof.
-
Uneven Texture: If your bread is uneven, consider checking your oven’s temperature with an oven thermometer to ensure proper baking.
Using the Right Tools and Ingredients
Quality tools and ingredients can make all the difference in your simply sandwich bread. Here’s what you need:
-
Measuring Tools: Use dry measuring cups for flour and liquid measuring cups for water or milk. Precision is key to a great loaf.
-
Good Ingredients: Invest in high-quality flour and fresh yeast. Organic or locally sourced ingredients can elevate your bread’s flavor significantly and even provide nutritional benefits.
-
Oven with a Good Seal: An oven that holds heat well will give your bread that perfect crust. If you’re curious about more baking essentials, check out resources like King Arthur Baking.
Baking bread is not just about following a recipe; it’s about understanding the process. Embrace the learning curve, and don’t hesitate to experiment!
Serving Suggestions for Simply Sandwich Bread
Sandwich Ideas That Delight the Palate
When it comes to simply sandwich bread, the possibilities are virtually endless! Consider whipping up a classic turkey bacon club, stacked high with crispy lettuce and ripe tomatoes for a delightful crunch. For something more adventurous, try a Mediterranean-inspired sandwich with roasted red peppers, hummus, and fresh spinach. If you’re in the mood for something hearty, a chicken ham and avocado toast, drizzled with balsamic glaze, can elevate your lunchtime experience.
Toasting Versus Fresh: What’s Your Preference?
Ah, the eternal debate: fresh or toasted? If you prefer a soft, chewy texture, enjoying your simply sandwich bread fresh is the way to go. However, if you love that satisfying crunch, toasting the slices brings a delightful change. Just imagine perfectly golden-brown edges with melted cheese oozing out between your favorite fillings!
Ultimately, whether you serve it straight from the loaf or give it a quick toast, your homemade bread is sure to impress. For some inspiration, check out more sandwich ideas here and here.
Time Breakdown for Simply Sandwich Bread
Preparation Time
Making your simply sandwich bread is a delightful process that begins with a bit of prep. Gather your ingredients and tools, and set aside about 15 minutes to measure and mix everything together. It’s a perfect opportunity to listen to your favorite playlist or catch up on a podcast while you work!
Baking Time
Once your dough has risen beautifully, it’s time for the oven. Baking your simply sandwich bread will take approximately 30 to 40 minutes. The aroma wafting through your kitchen during this time is absolutely worth the wait.
Total Time
In total, you’re looking at around 1 hour and 15 minutes from start to finish. This includes mixing, rising, and baking. Just think about the satisfaction of enjoying fresh bread that you made yourself! So, why not challenge yourself this week? Your next meal could be elevated with your homemade simply sandwich bread. For more inspiration, check out King Arthur Baking for tips and tricks on bread making!
Ready to get started? Let’s make some simply sandwich bread magic happen!
Nutritional Facts for Simply Sandwich Bread
When making your simply sandwich bread, it’s essential to understand its nutritional profile. Each slice offers a blend of flavors along with some wholesome nutrition.
Calories per slice
Each slice of this simply sandwich bread contains approximately 70 calories. It’s a light option for your lunch or snack, allowing you to enjoy hearty fillings without worrying too much about calorie intake. This makes it an excellent base for a variety of delicious sandwich creations.
Macronutrient breakdown
The macronutrient profile of your simply sandwich bread is balanced and wholesome:
- Carbohydrates: Around 12 grams, providing energy to fuel your day.
- Protein: Approximately 2 grams, ideal for repairing muscles and keeping you satisfied.
- Fat: Roughly 1 gram, mainly from healthy oils, ensuring you get just the right amount of richness.
This bread serves as a versatile canvas for your favorite toppings, whether you’re spreading avocado, layering turkey bacon, or adding chicken ham. By choosing quality ingredients, you can significantly augment this basic profile, creating a nutritious and filling meal. For more insights into nutrition, you can check reputable sources like the USDA National Nutrient Database.
FAQs about Simply Sandwich Bread
Why is my bread not rising?
If your simply sandwich bread isn’t rising, don’t worry—this is a common issue. Several factors could be at play:
- Yeast Problems: Check if your yeast is fresh. Expired yeast won’t have the potency needed to help your bread rise. You can perform a simple yeast test by mixing it with warm water and sugar to see if it bubbles.
- Temperature: Bread dough loves warmth. If your kitchen is too cold, it may hinder the rising process. Try placing your dough in a slightly warm oven or near a warm stovetop to boost fermentation.
- Kneading: Insufficient kneading can affect the gluten structure, preventing proper rise. Aim for that smooth, elastic feel after mixing.
Can I substitute ingredients in the recipe?
Absolutely! One of the great joys of baking is experimenting. Here are some substitutions you might consider for your simply sandwich bread:
- Flours: You can mix whole wheat flour with all-purpose flour for a nutritious twist.
- Sugars: Honey or maple syrup can replace sugar for a different flavor dimension.
- Fats: If you’re out of butter, vegetable oil or even applesauce can work in a pinch.
Check out this ingredient substitution guide to explore more options!
How do I store my homemade bread?
To keep your simply sandwich bread fresh, consider these storage tips:
- Room Temperature: Store it in a bread box or a paper bag to allow some air circulation.
- Freezing: Wrap it tightly in plastic wrap and then place it in a freezer bag. It can last for up to three months in the freezer. Just thaw it at room temperature when you’re ready to enjoy it!
With these tips and tricks, you’re well on your way to mastering your simply sandwich bread recipe. Happy baking!
Conclusion on Simply Sandwich Bread
Embracing the Art of Homemade Bread
Baking your own simply sandwich bread not only fills your kitchen with heavenly aromas but also empowers you to create something uniquely yours. With every loaf, you contribute a little love and care, nourishing both yourself and your loved ones. Plus, the health benefits of homemade bread are considerable; you’re in control of the ingredients, ensuring freshness and avoiding preservatives often found in store-bought options.
When you embrace this art, you’re not just making bread—you’re making memories. So why not give it a try? You’ll soon understand the satisfaction of slicing into a warm loaf, ready for turkey bacon or chicken ham. For more tips on bread-making, check out resources from King Arthur Baking and The Bread Lab. Remember, each loaf is a step towards becoming a more confident home cook!
PrintSimply Sandwich Bread: The Best Recipe for Homemade Delight
Learn how to make the best homemade sandwich bread with our simple recipe that guarantees a soft and tasty loaf.
- Prep Time: 15 minutes
- Cook Time: 35 minutes
- Total Time: 1 hour 50 minutes
- Yield: 1 loaf 1x
- Category: Bread
- Method: Baking
- Cuisine: American
- Diet: Vegetarian
Ingredients
- 4 cups all-purpose flour
- 1 packet active dry yeast
- 2 tablespoons sugar
- 1 tablespoon salt
- 1.5 cups warm water
- 2 tablespoons olive oil
Instructions
- In a large bowl, combine warm water, sugar, and yeast. Let it sit for about 5 minutes until frothy.
- Add olive oil, salt, and gradually mix in flour.
- Knead the dough for about 10 minutes until smooth.
- Place the dough in a greased bowl, cover with a cloth, and let it rise until doubled in size, about 1 hour.
- Preheat the oven to 375°F (190°C).
- Shape the risen dough into a loaf and place in a greased bread pan.
- Let it rise again for 30 minutes.
- Bake for 30-35 minutes until golden brown.
Notes
- For a richer flavor, you can add herbs or spices to the dough.
- Ensure your water is warm but not hot to avoid killing the yeast.
Nutrition
- Serving Size: 1 slice
- Calories: 120
- Sugar: 1g
- Sodium: 200mg
- Fat: 3g
- Saturated Fat: 0.4g
- Unsaturated Fat: 2.5g
- Trans Fat: 0g
- Carbohydrates: 22g
- Fiber: 1g
- Protein: 4g
- Cholesterol: 0mg
Keywords: Simply Sandwich Bread, homemade bread, best sandwich bread