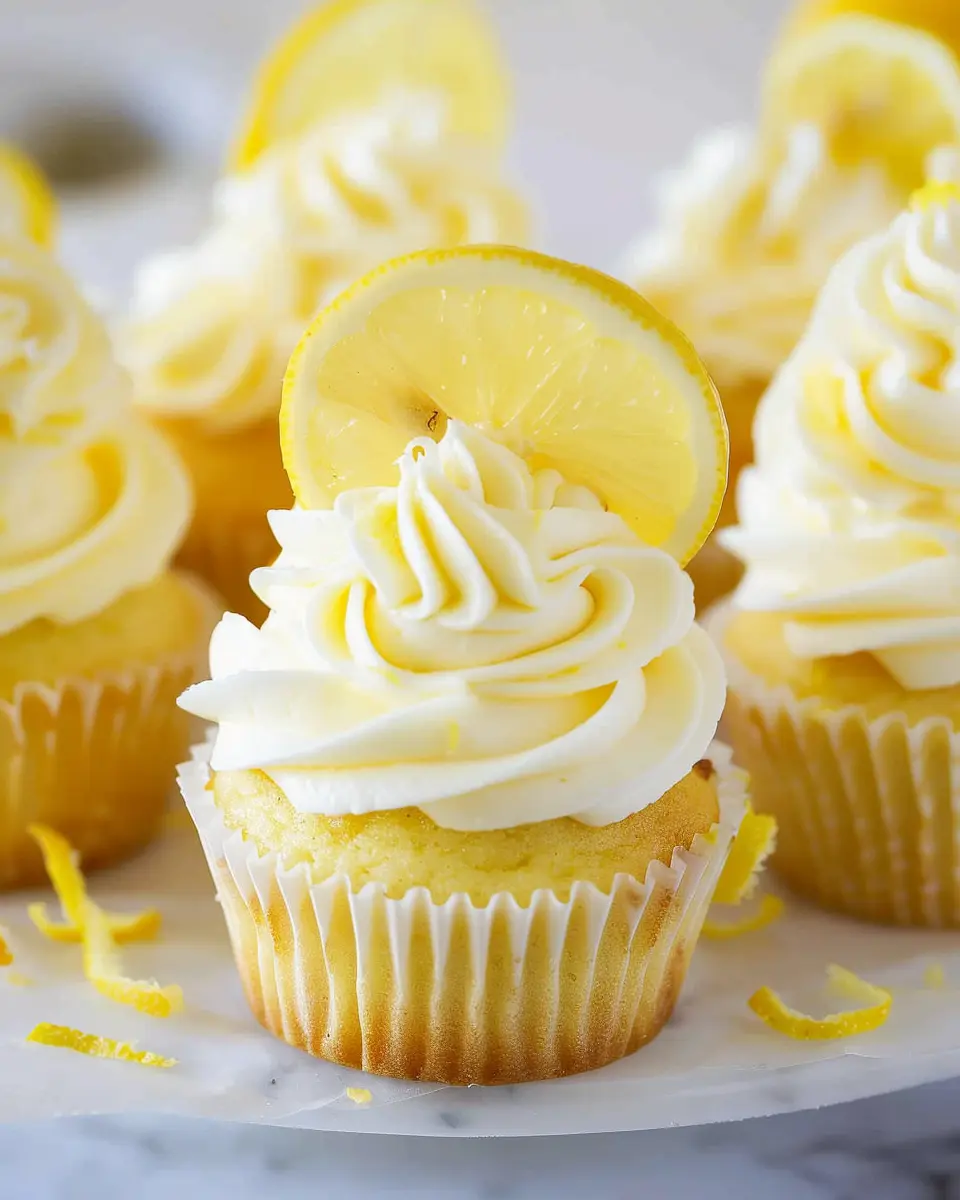
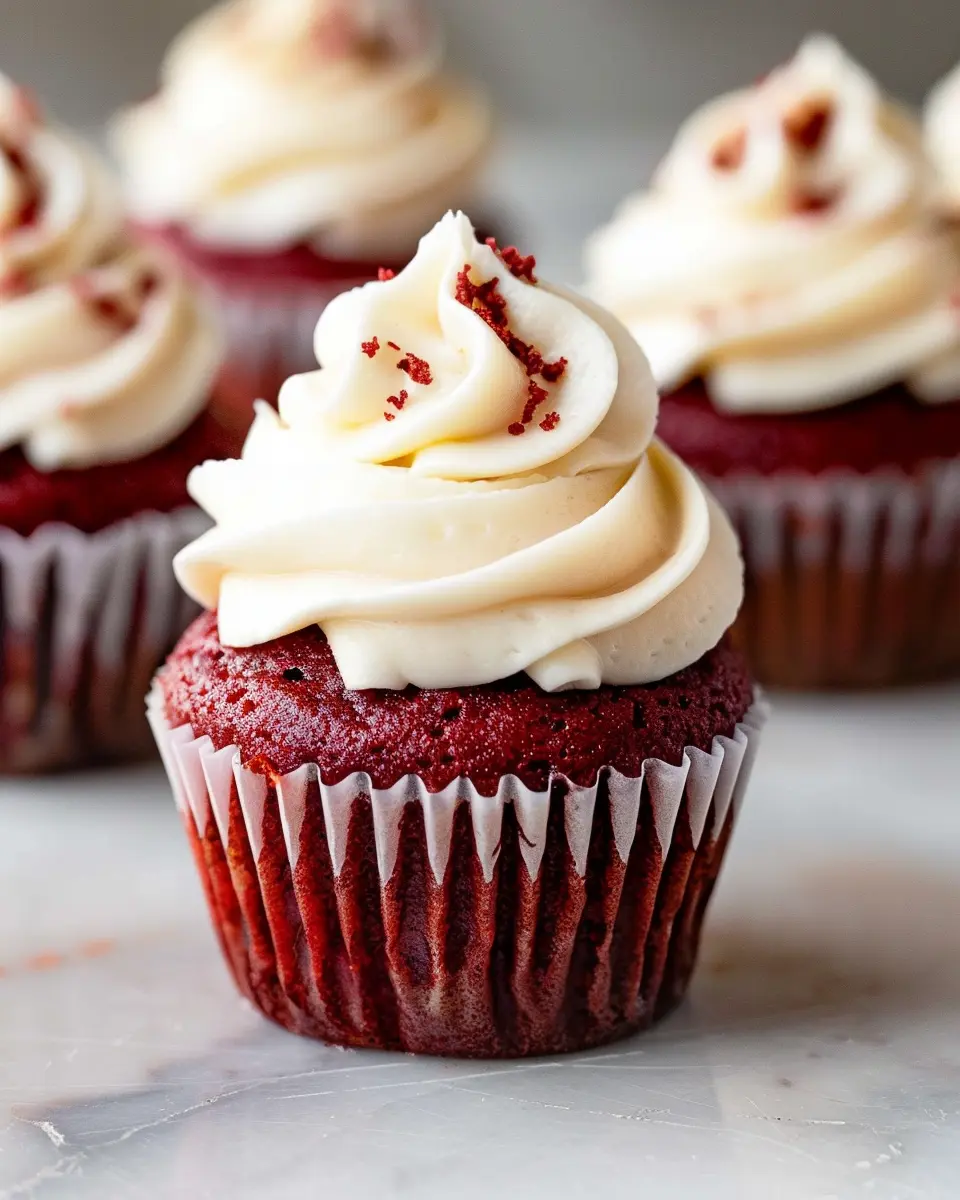
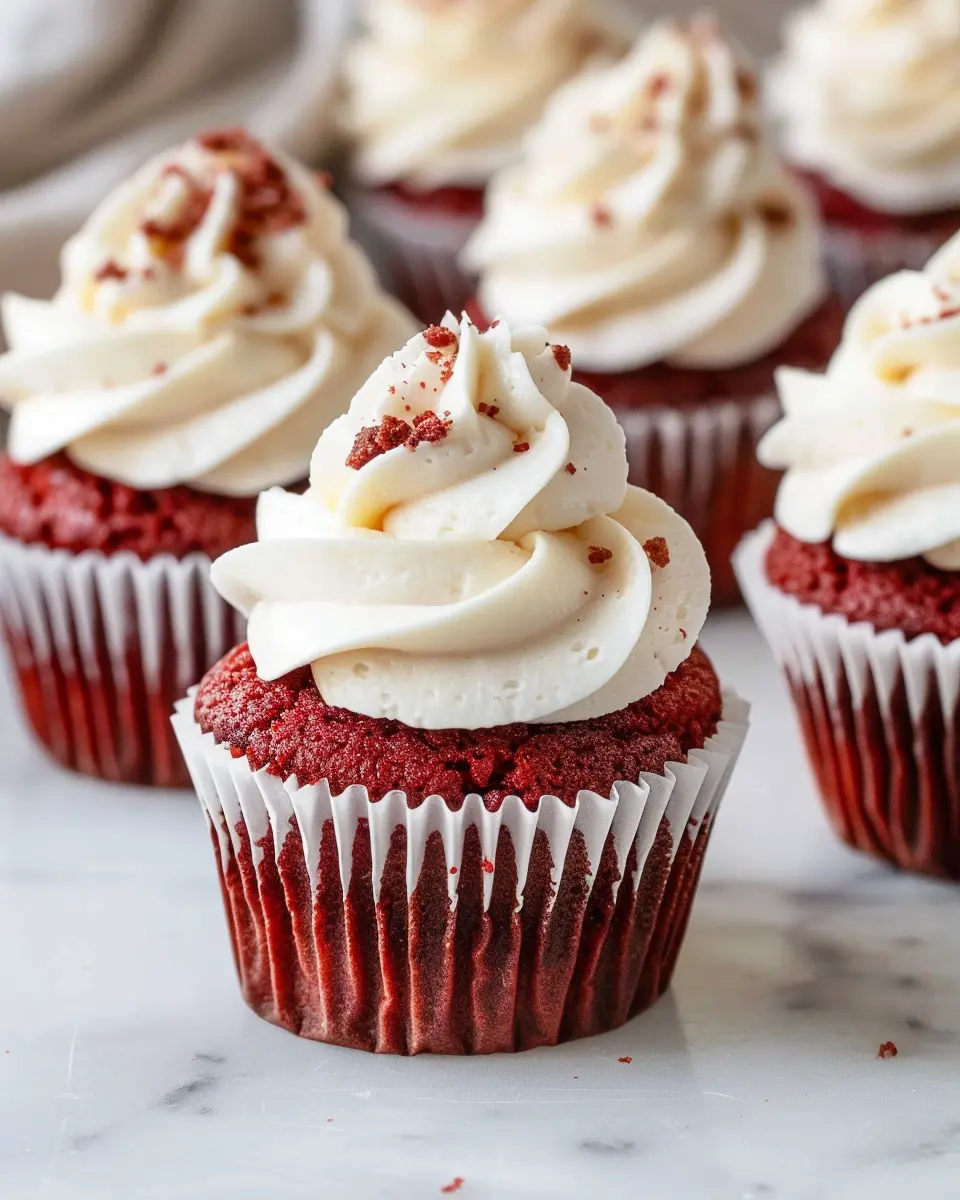
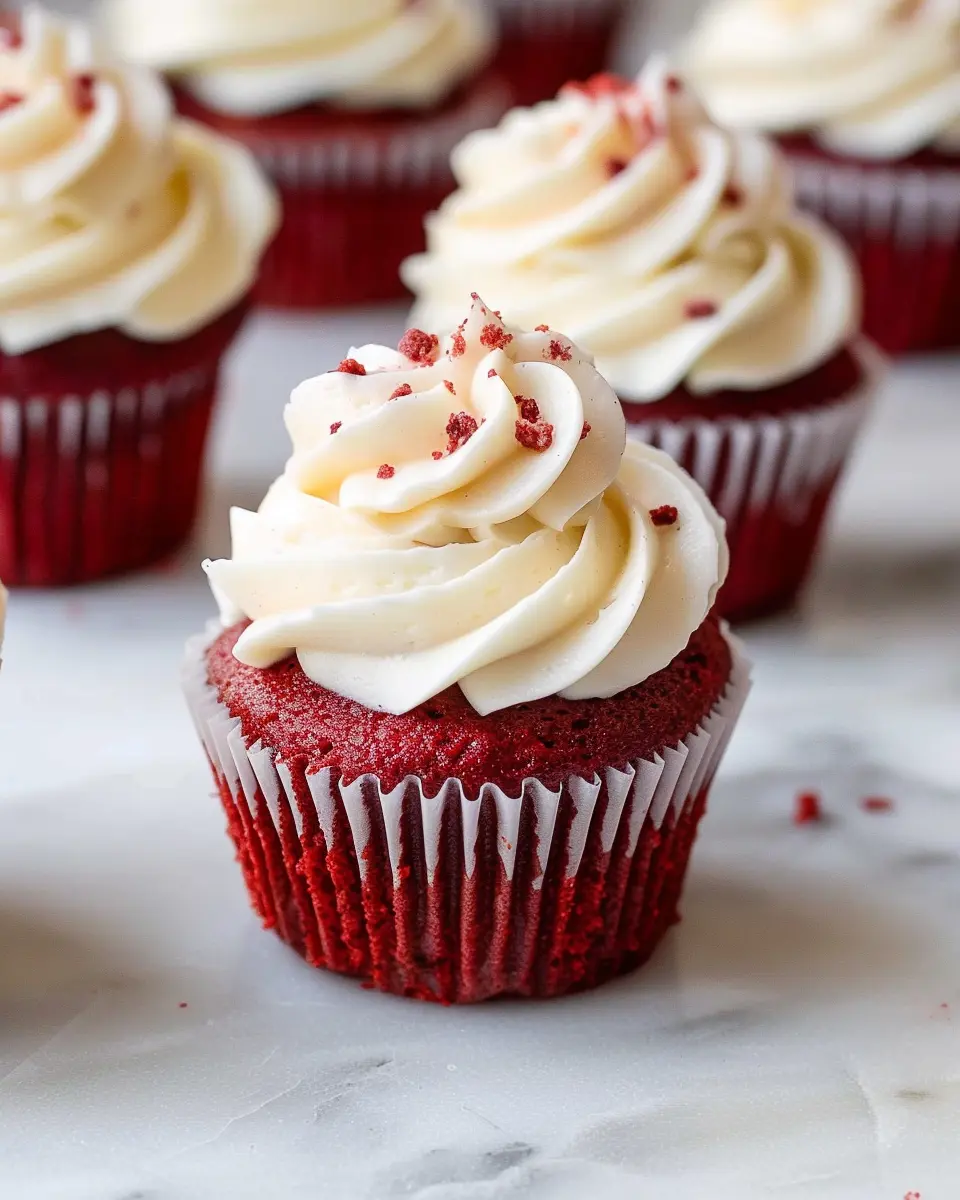
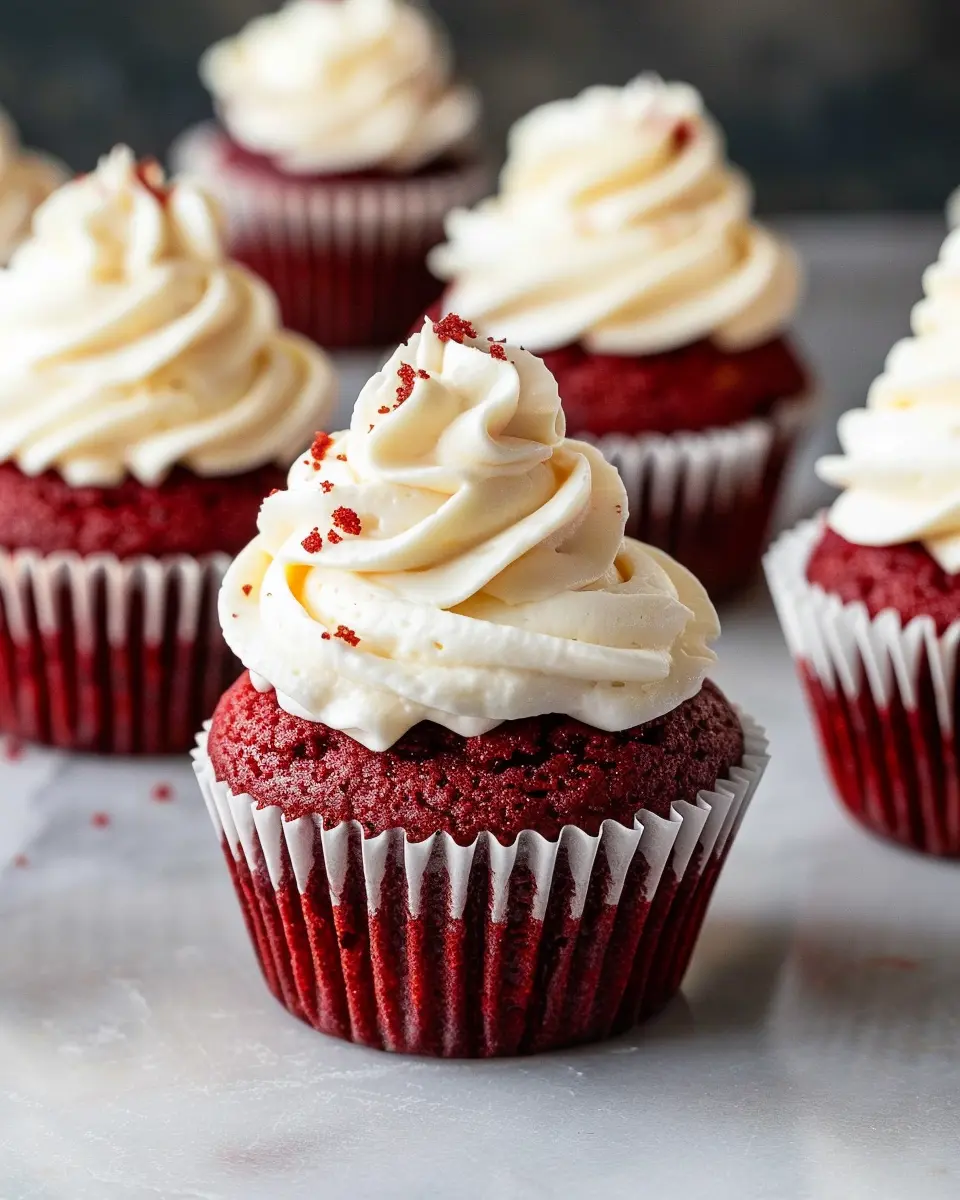
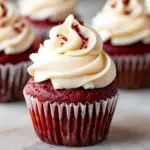
Introduction to Red Velvet Cupcakes
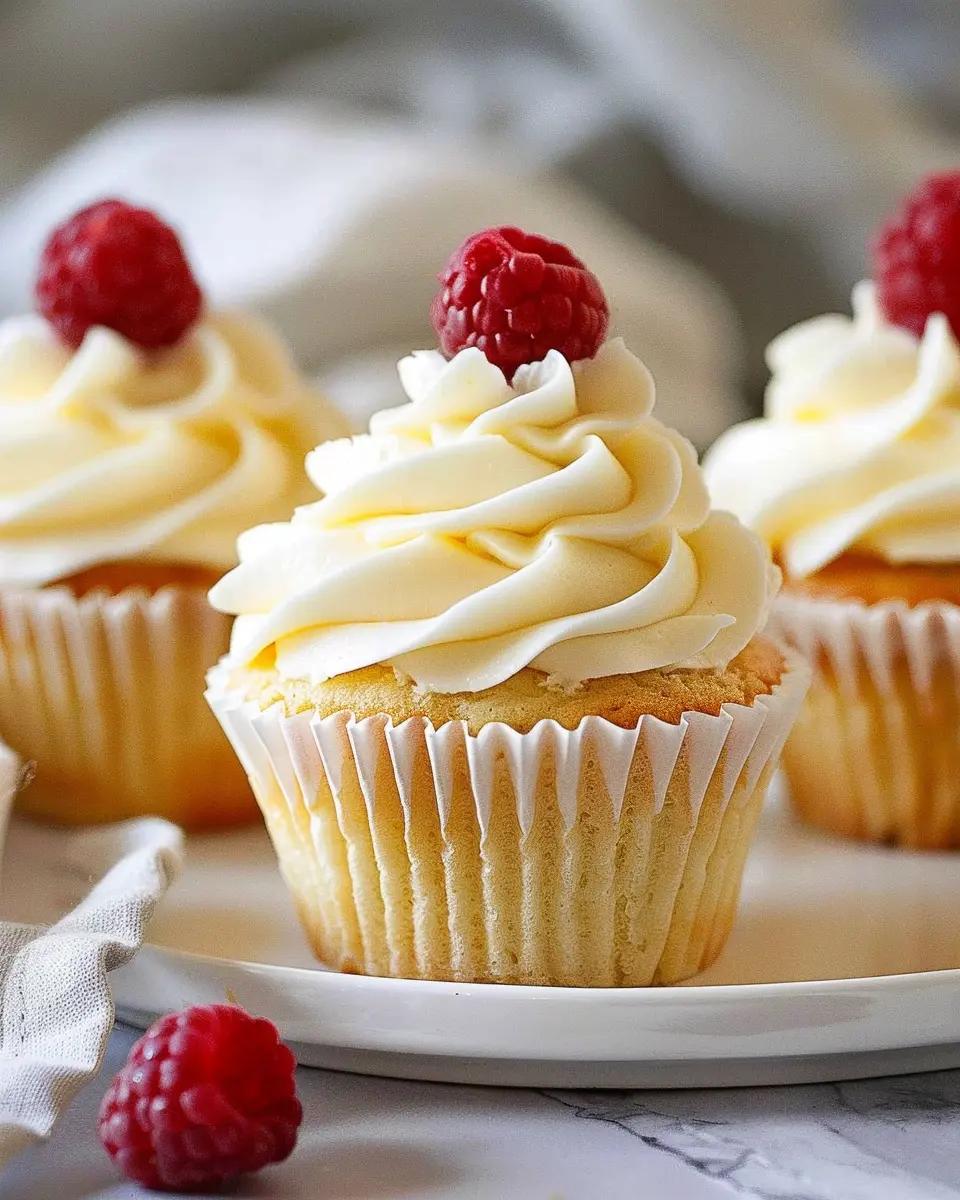
Red velvet cupcakes are more than just a delicious treat; they’re a celebration in a cupcake form! With their distinctive red hue and luscious cream cheese frosting, these cupcakes add a touch of glamour to any occasion, from birthday parties to cozy gatherings. But what truly sets red velvet cupcakes apart? Let’s dive into the charm and allure of these delightful desserts.
What Makes Red Velvet Cupcakes So Special?
The essence of red velvet cupcakes lies not just in their striking color but also in their unique flavor profile. The subtle hint of cocoa combined with a tangy kick from buttermilk gives them a taste that’s both rich and refreshing. Did you know that the origins of red velvet cake can be traced back to the 1800s? Over the years, its popularity surged, especially in the Southern United States, where it was often paired with a classic cream cheese frosting, creating a dynamic duo that’s hard to resist.
- Visual Appeal: The vibrant red color contrasts beautifully with the creamy frosting, making these cupcakes a visual feast. They’re perfect for Instagram posts or special celebrations!
- Flavor Balance: The combination of sweetness, chocolatey depth, and slight acidity creates a layered taste experience that intrigues the palate. No wonder they’ve become a favorite among dessert lovers!
- Versatility: While they shine as a standalone dessert, red velvet cupcakes can easily fit in with a larger dessert table, making them a versatile choice for any occasion.
Beyond their deliciousness, red velvet cupcakes also carry a sense of nostalgia and festivity. They remind many of family gatherings, special milestones, and moments of joy. If you’re looking to recreate that feeling, check out sources like Serious Eats for tips on how to perfect your baking technique.
So, are you ready to experience the magic of red velvet cupcakes for yourself? Let’s roll up our sleeves and get baking! With the right ingredients and a bit of love, you’ll be savoring these dreamy delights in no time.
Ingredients for Red Velvet Cupcakes
Baking red velvet cupcakes is a delightful experience that brings joy to any occasion! Let’s dive into the essential ingredients you’ll need to create these velvety treats.
Essential Ingredients
- All-purpose flour: 2 cups for that perfect fluffy texture.
- Granulated sugar: 1 ½ cups to add just the right amount of sweetness.
- Baking powder: 1 teaspoon, essential for that lovely rise.
- Baking soda: 1 teaspoon, which helps balance the acidity.
- Cocoa powder: 1 tablespoon for a subtle chocolate flavor.
- Vegetable oil: 1 cup keeps the cupcakes moist.
- Buttermilk: 1 cup adds rich flavor and tenderness. (If you don’t have any, a mix of milk and vinegar works wonders!)
- Large eggs: 2 for binding all the ingredients together.
- Red food coloring: 2 tablespoons to achieve that iconic hue.
- Vanilla extract: 1 teaspoon enhances the overall flavor.
- Salt: Just a pinch to bring out the flavors.
These ingredients combine beautifully to create the red velvet cupcakes you’ve always dreamed of. For more inspiration, check out resources like King Arthur Baking for baking tips and tricks to elevate your cupcake game. Who knew baking could be so fun? With a few staple items, you’ll be on your way to sharing delicious moments with friends and family!
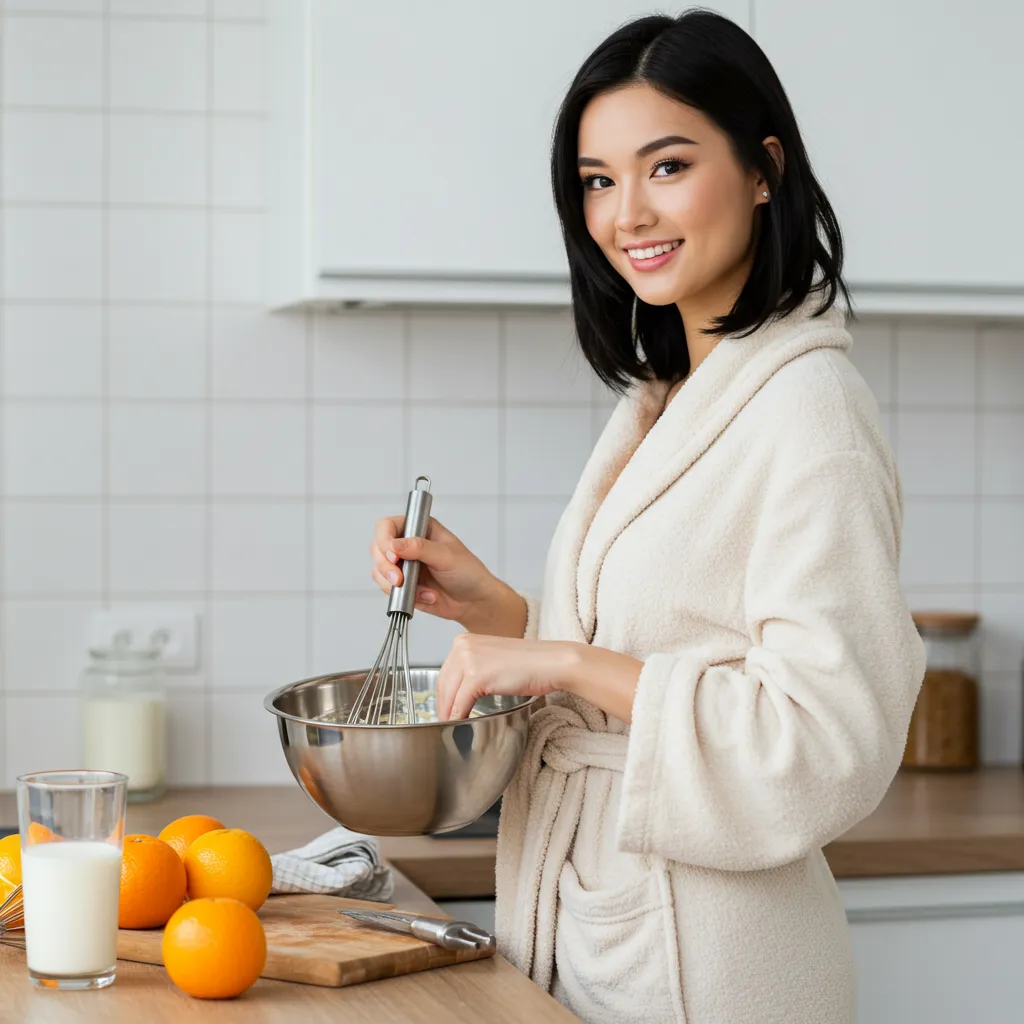
Preparing Red Velvet Cupcakes
Red velvet cupcakes have a unique charm that combines the richness of chocolate with a delightful hint of tanginess. Plus, who can resist that deep crimson color? Let’s walk through the preparation of these decadent treats step by step, ensuring you have all the tools and tips you need to impress friends, family, or even just yourself!
Gather and prepare your ingredients
Before you dive into baking, take a moment to gather your ingredients. Here’s what you’ll need:
- 1 ½ cups all-purpose flour
- 1 cup granulated sugar
- 1 teaspoon baking soda
- 1 teaspoon salt
- 1 teaspoon cocoa powder (for that subtle chocolate flavor)
- 1 cup vegetable oil
- 1 cup buttermilk (or substitute with yogurt)
- 1 large egg
- 2 tablespoons red food coloring
- 1 teaspoon vanilla extract
- 1 teaspoon white vinegar
Position your ingredients on the counter, and don’t forget to preheat the oven to 350°F (175°C). If you’re unfamiliar with some ingredients, check out detailed explanations on Food Network or Serious Eats.
Combine the dry ingredients
Now let’s get down to business! In a large mixing bowl, combine your dry ingredients: flour, sugar, baking soda, salt, and cocoa powder. Whisk these together to ensure they are evenly distributed—this helps create that light, fluffy texture we all love in our red velvet cupcakes.
Cream the butter and sugar
Moving on! In another bowl, it’s time to cream together the oil and sugar until it’s light and fluffy. If you’re using butter instead of oil, soften it first. This process blends air into the mixture, creating a light texture in your cupcakes. If you own an electric mixer, it’s worth breaking it out now!
Add in the wet ingredients
Next, add in the wet ingredients: beat the egg, then mix it into the creamed mixture along with the buttermilk, food coloring, vanilla extract, and white vinegar. The vinegar might seem odd, but it’s essential for that signature red velvet tang and helps the cupcakes rise beautifully!
Mix in the dry and wet ingredients
Now it’s time to combine everything! Gradually add the dry ingredients into the wet mixture, stirring gently. Make sure not to overmix—it’s okay if there are a few lumps. The key to moist red velvet cupcakes is to keep them tender, and overmixing can create a tougher texture.
Fill the cupcake liners
Grab a cupcake tray and line it with paper cups. Using a scoop, fill each liner about two-thirds full. This will give them room to rise without overflowing, ensuring they make that perfect little dome shape. As you’re filling, remember: it’s about balance. If you have a lot of batter left, you may want to check how full your first liners are!
Bake and cool the cupcakes
Pop your cupcake tray into the oven and set a timer for 18–22 minutes. The cupcakes are done when a toothpick inserted into the center comes out clean. When they’re ready, allow them to cool in the tray for about 5 minutes before transferring them to a wire rack. Cooling is essential—if you frost them while they’re warm, the cream cheese frosting will melt away, losing that luscious texture.
After following these steps, you’ll have a batch of delightful red velvet cupcakes ready for frosting. Imagine the smiles as you present these beauties!
By approaching your red velvet cupcake preparation with a bit of organization and care, you set the stage for a delicious dessert that captivates all who taste it. For additional tips on how to frost your cupcakes beautifully, check out this frosting guide! Enjoy the baking process and the joy it brings!
Making Cream Cheese Frosting
If you’re wondering how to create that perfect cream cheese frosting to top off your homemade red velvet cupcakes, look no further! This decadent frosting is rich and tangy, making it the ideal partner for your cupcakes. Let’s dive into the steps to whip up this delightful topping.
Beat the butter to fluffy perfection
Start by taking your unsalted butter out of the fridge, letting it soften slightly. Using a hand mixer or a stand mixer, beat the butter on medium speed for about 2-3 minutes until it looks light and fluffy. This step is crucial because fluffy butter provides a wonderful texture in your frosting.
Add the cream cheese
Next, gently add in your softened cream cheese. Make sure it’s at room temperature for easier mixing. Beat on low speed until blended, which usually takes about a minute. The cream cheese will add that signature tanginess that pairs beautifully with your red velvet cupcakes, enhancing their flavor.
Incorporate the powdered sugar
Gradually sift in powdered sugar—around 2-3 cups depending on how sweet you want it. Mix this in on low speed to avoid a sugar cloud. Once incorporated, you can increase the speed until smooth. This is where your frosting starts to come together, transforming it into a creamy dream.
Add vanilla and a pinch of salt
For the final touch, add about a teaspoon of vanilla extract and a tiny pinch of salt to balance the sweetness. This little addition can really elevate the taste. Mix again until everything is well combined.
Frost the cupcakes
Now comes the fun part! Use a spatula or piping bag to generously frost your red velvet cupcakes. You can swirl it on top or create fun designs—whatever your heart desires. Remember, presentation counts!
By following these steps, you’ll have your cream cheese frosting ready to impress. For more insights on baking basics, check out resources like King Arthur Baking or Serious Eats!
Baking Tips and Notes for Red Velvet Cupcakes
Importance of Room Temperature Ingredients
When baking red velvet cupcakes, using room temperature ingredients—like eggs and butter—is essential. It ensures that they blend together more smoothly, creating a uniform batter and a light, fluffy texture. If you’re short on time, you can place cold eggs in warm water for about 10 minutes to speed up the process.
Avoiding Overmixing the Batter
One of the biggest pitfalls in cupcake baking is overmixing. Once you combine the dry ingredients with the wet, mix gently until just combined. Overmixing can lead to dense cupcakes, rather than the light and airy texture you desire. Remember, it’s okay if there are a few small lumps!
Measuring Flour Accurately
Proper measurement of flour is crucial for red velvet cupcakes. Too much flour can make your cupcakes dry, so it’s best to use the spoon-and-level method. Spoon flour into your measuring cup and level it off with a knife. If you want to guarantee accuracy, consider using a kitchen scale for precise measurements.
For more detailed tips on baking techniques, check out resources like King Arthur Baking or America’s Test Kitchen. Happy baking!
Serving Suggestions for Red Velvet Cupcakes
Pairing Cupcakes with Milk or Coffee
When it comes to enjoying your delectable red velvet cupcakes, the right beverage can take the experience to a whole new level. Opt for a glass of cold milk, which beautifully complements the flavors of the cupcakes, balancing the richness of the cream cheese frosting. If you’re in the mood for something a bit more energizing, a cup of robust coffee is a fantastic choice. The slight bitterness of the coffee pairs wonderfully with the sweetness of the frosting, creating a harmonious taste sensation.
Ideas for Decorating Your Presentation
Presentation is key, especially when serving red velvet cupcakes at a gathering. Consider using decorative cupcake liners that enhance their vibrant hue. Topping each cupcake with a sprinkle of cocoa powder or crushed nuts can add texture and visual interest. For a touch of elegance, drizzle some melted white chocolate on top or add a fresh raspberry. Not only do these embellishments make your treats look stunning, but they also offer delightful flavor contrasts.
If you want to elevate your serving, arranging the cupcakes on a tiered stand can create an eye-catching centerpiece. For more tips on presenting baked goods beautifully, check out sources like Food52 and Taste of Home for inspiration!
Time Breakdown for Red Velvet Cupcakes
Getting the timing just right is essential when it comes to baking red velvet cupcakes that are both delicious and visually appealing. Here’s how long you’ll need for each step of the process:
Preparation Time
Spend about 20-25 minutes gathering your ingredients and mixing them together. This is when you’ll blend the raspberry flavor and the rich, vibrant colors that make these cupcakes so special.
Baking Time
Once your batter is ready, pour it into your cupcake liners and pop them in the oven for approximately 18-20 minutes. You’ll know they’re done when a toothpick inserted comes out clean.
Cooling Time
After baking, allow your red velvet cupcakes to cool in the pan for 5-10 minutes, then transfer them to a wire rack to cool completely. This usually takes another 30-45 minutes.
Total Time
On the whole, you’re looking at about an hour and a half from start to finish. Not too shabby for a batch of delightful red velvet cupcakes topped with luscious cream cheese frosting!
For more baking tips, check out resources like Serious Eats or BBC Good Food to enhance your baking game!
Nutritional Facts for Red Velvet Cupcakes
When indulging in red velvet cupcakes, it’s important to consider their nutritional profile. Here’s a quick breakdown of what you can expect:
Calories
A standard red velvet cupcake usually contains around 300 calories. While that may seem high, these treats are often shared, making them more manageable as an occasional delight.
Protein
Each cupcake packs about 2-3 grams of protein, thanks to the eggs and dairy in the recipe. Although not a significant source, every bit helps if you’re trying to balance your diet.
Sugar Content
The sugar content in a red velvet cupcake can range from 20 to 25 grams. It’s crucial to keep this in mind, especially if you’re watching your sugar intake. For delicious alternatives to traditional ingredients, consider checking out this guide on healthy baking substitutes.
While you savor your treat, remember that moderation is key. Enjoying red velvet cupcakes as part of a balanced diet can make life a bit sweeter without compromising health. What’s your favorite way to enjoy them—plain, or with that creamy frosting?
FAQs about Red Velvet Cupcakes
How can I store leftover cupcakes?
Once you’ve relished your delicious red velvet cupcakes, you might wonder about the best way to store any extras. The key is to keep them fresh! Place your cupcakes in an airtight container and store them at room temperature for up to three days. If you want to extend their shelf life, pop them in the fridge for a week. For longer storage, freeze them. Wrap each cupcake in plastic wrap and place them in a freezer-safe container; they can last up to three months. When you’re ready to indulge again, just thaw them at room temperature!
Can I substitute ingredients in this recipe?
Absolutely! Recipe substitutions can make a big difference. If you’re out of certain ingredients or looking for alternatives, here are some handy swaps for your red velvet cupcakes:
- All-purpose flour: You can use cake flour for a lighter texture.
- Buttermilk: Combine regular milk with a tablespoon of lemon juice or vinegar for a DIY buttermilk.
- Vegetable oil: Melted coconut oil works beautifully, adding a subtle flavor boost.
Don’t hesitate to mix and match! For further inspiration, check out this guide on ingredient substitutions that can help you craft the perfect cupcakes.
What can I do if my frosting is too runny?
A runny frosting can be disappointing, but fear not! Here are some quick fixes to salvage your cream cheese frosting:
- Chill it: Pop your frosting in the fridge for about 30 minutes, then re-whip it to see if it thickens up.
- Add powdered sugar: Gradually mix in more powdered sugar until you achieve the desired consistency.
- Cream cheese: Sometimes, adding a bit more cream cheese helps since it thickens the frosting while enhancing flavor.
With these tips, you’ll be back to enjoying your red velvet cupcakes in no time!
Conclusion on Red Velvet Cupcakes
In summary, red velvet cupcakes are a delightful treat that adds a pop of color and a rich flavor to any dessert table. Their unique blend of cocoa powder and buttermilk creates a moist, tender crumb that pairs beautifully with the signature cream cheese frosting. Whether you’re celebrating a special occasion or simply indulging in a sweet craving, these cupcakes will not disappoint!
Don’t shy away from customizing them with fun toppings or filling them with surprises. Check out resources like Baking Bad for pro tips, and explore culinary sites like Serious Eats for inspiration. Enjoy baking your own batch, and watch them disappear fast!
PrintRed Velvet Cupcakes: The Best Cream Cheese Frosting Treat
Delicious red velvet cupcakes topped with rich cream cheese frosting.
- Prep Time: 20 minutes
- Cook Time: 20 minutes
- Total Time: 40 minutes
- Yield: 12 cupcakes 1x
- Category: Dessert
- Method: Baking
- Cuisine: American
Ingredients
- 1 1/2 cups all-purpose flour
- 1 cup granulated sugar
- 1 teaspoon baking soda
- 1 teaspoon salt
- 1 teaspoon cocoa powder
- 1 cup vegetable oil
- 1 cup buttermilk
- 2 large eggs
- 2 tablespoons red food coloring
- 1 teaspoon vanilla extract
- 1 teaspoon white vinegar
- 8 ounces cream cheese, softened
- 1/2 cup unsalted butter, softened
- 4 cups powdered sugar
- 1 teaspoon vanilla extract
Instructions
- Preheat your oven to 350°F (175°C) and line a cupcake pan with liners.
- In a mixing bowl, combine the flour, sugar, baking soda, salt, and cocoa powder.
- In another bowl, mix the oil, buttermilk, eggs, food coloring, vanilla extract, and vinegar.
- Gradually mix the dry ingredients into the wet ingredients until just combined.
- Fill the cupcake liners about 2/3 full and bake for 18-20 minutes, or until a toothpick comes out clean.
- Let cupcakes cool completely before frosting.
- To make the frosting, beat together the cream cheese and butter until smooth.
- Gradually add the powdered sugar and vanilla, mixing until fluffy.
- Spread or pipe the frosting onto the cooled cupcakes.
Notes
- For extra flavor, consider adding a dash of almond extract to the frosting.
- Always use room temperature ingredients for the best results.
Nutrition
- Serving Size: 1 cupcake
- Calories: 320
- Sugar: 25g
- Sodium: 200mg
- Fat: 15g
- Saturated Fat: 8g
- Unsaturated Fat: 5g
- Trans Fat: 0g
- Carbohydrates: 40g
- Fiber: 1g
- Protein: 3g
- Cholesterol: 50mg
Keywords: Red Velvet Cupcakes, Cream Cheese Frosting, Dessert